So this is a red bow that I made for the holiday season!
Step 1: Trace the bow onto the copper with a sharpie.
Step 2: Cut the bow out with a saw.
Step 3: Clean the heck out of the metal with a glass brush and pumice powder.
Step 4: Using a paint brush, put the "glue" on the metal. It's actually called Klyr Fire.
Step 5: Sift the glass powder onto the metal. We use a mask to protect our lungs from the powder that gets in the air from sifting. Breathing in glass is not a good idea! It causes asthma and can eventually cause bleeding!! YUK! Ok, total buzz kill, but we do need to be careful! If you decide to try this it's important to know safety precautions!
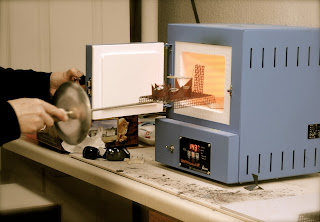
Step 6: Put in a kiln at 1600 degrees. We also use UV protective glasses to prevent eye damage from the heat rods inside the kiln.
Leave it in for 2 minutes
Take it out!
So, this is not the entire instructions for enameling. There are a lot of in between steps that I skipped to keep this blog post short! Enameling is fun but time consuming.
Here are some other things that I have done. Well, I can't say that I actually finish them. I start them, cut them out and put the first coat of enamel on, but it takes a couple coats, cleaning, and fixing stilt marks and..... My mom does the rest.
This bird was the first thing I made from start to finish! It's still my favorite.
I also love my Skully Roger. I just sold this nugget, but I'll have to make another!!


No comments:
Post a Comment