I can't wait to post my recent painting and finishing projects!!
Wednesday, June 1, 2011
Monday, May 16, 2011
Here are some things I've done the past few months... Needless to say, I really love bunting. And Instagram.
I was inspired to make this bunting from Blue Cricket Design. I used tulle, fabric, brown paper bags, eyelets, little paper flowers and ribbon. This was fun and easy and would totally make another one.
This wreathe I made a couple weeks ago. I ripped the fabric into strips and wrapped it around the styrofoam wreathe. The flowers are natural coffee filters cut into smaller circles and layered. I used a hot glue gun to secure the fabric in the back and burned the heck out of my finger! I think its time to get low temp glue gun!
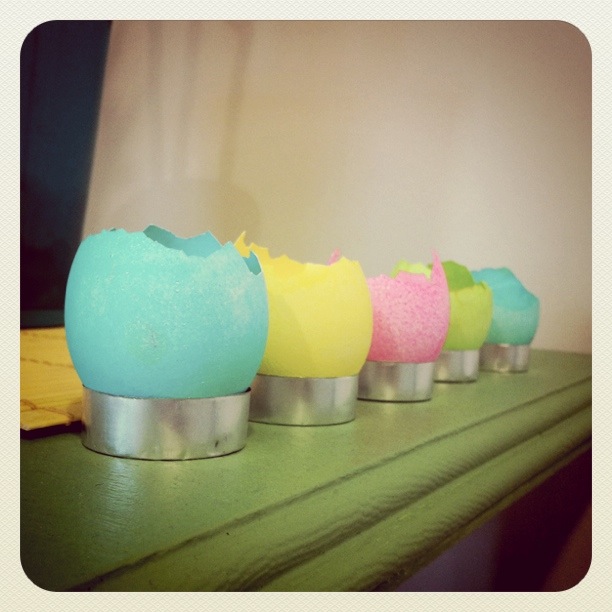
These were some Easter egg candles I made that I didn't even get to use on Easter! Of course I forgot to bring them to my moms! Anyway, this idea is from Martha Stewart's Encyclopedia of Crafts. I modified a little for lack of supplies, but they turned out cute.
MORE BUNTING!! See, I think its becoming a problem... I got these frames at wallmart for around $4 a piece and just placed 12 x 12 pieces of paper in them. Because I love paper, this was enough for me! I cut out triangles with matching paper for the bunting and sewed it all together.
These are the paper designs in the frames. My Mind's Eye has really cute paper!!
I made this for Valentines day but never quite finished it in time. I really like it so it's still hanging up. I cut the heart out of red leather and stitched it onto the stripped fabric. This was the frame that didn't stand up to the Command strips and came crashing to the floor. The glass didn't break, but the frame did. Gorilla glued it back together and tah-dahhh! Good as new... sorta.
Tuesday, February 1, 2011
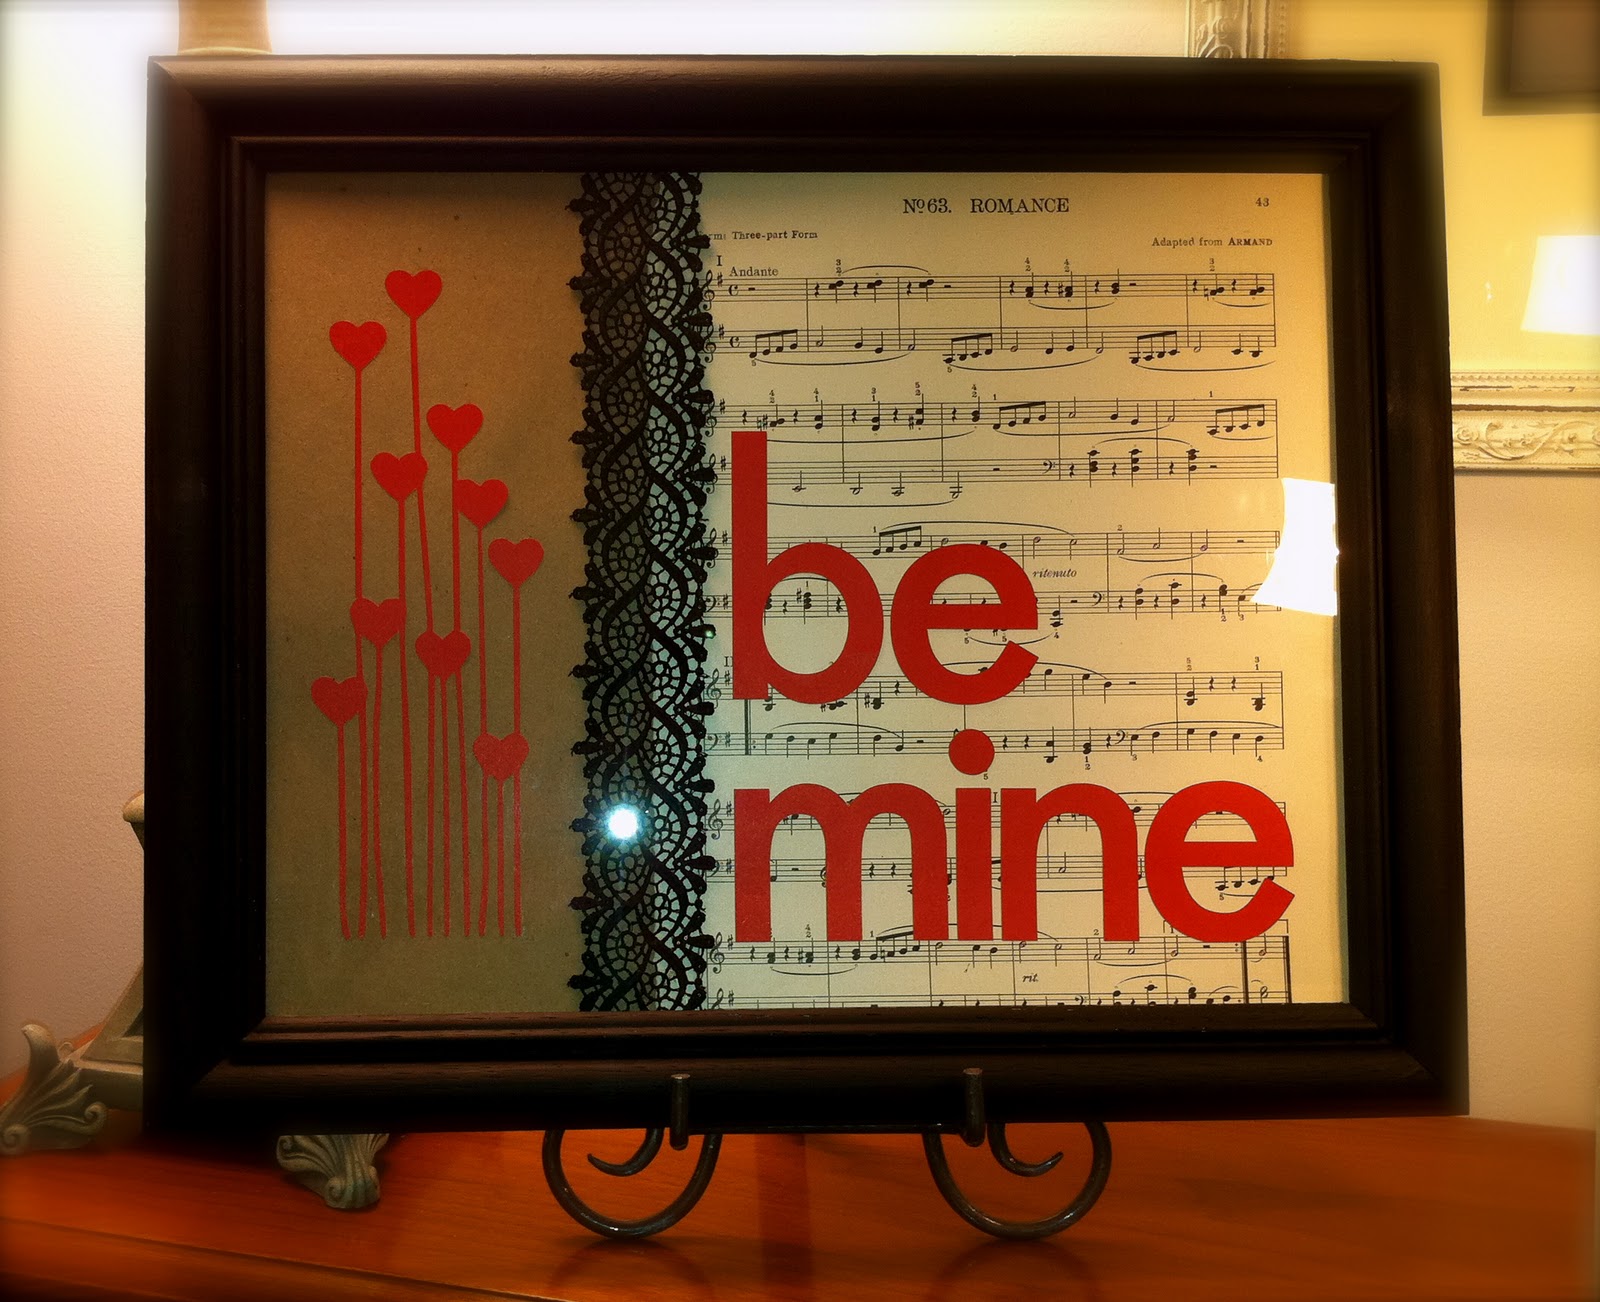
I originally thought I wanted a bunch of different papers and textures in this.. But I ended up with just a couple. I love my Silhouette. I haven't used the vinyl yet. I feel like I don't want to waste it!!
Friday, November 19, 2010
Enameling (a quick look)
My mom is a silversmith, metalsmith, enameler and jeweler and I am her apprentice. Our most recent adventure is enameling. It's hard to get the word out that we make all of our items by hand. So I thought I would show the quick version of how enameling works!
Step 2: Cut the bow out with a saw.
Step 3: Clean the heck out of the metal with a glass brush and pumice powder.
Step 4: Using a paint brush, put the "glue" on the metal. It's actually called Klyr Fire.
Step 5: Sift the glass powder onto the metal. We use a mask to protect our lungs from the powder that gets in the air from sifting. Breathing in glass is not a good idea! It causes asthma and can eventually cause bleeding!! YUK! Ok, total buzz kill, but we do need to be careful! If you decide to try this it's important to know safety precautions!
Step 6: Put in a kiln at 1600 degrees. We also use UV protective glasses to prevent eye damage from the heat rods inside the kiln.
Leave it in for 2 minutes
Take it out!
So, this is not the entire instructions for enameling. There are a lot of in between steps that I skipped to keep this blog post short! Enameling is fun but time consuming.
I also love my Skully Roger. I just sold this nugget, but I'll have to make another!!
So this is a red bow that I made for the holiday season!
Step 1: Trace the bow onto the copper with a sharpie.
Step 2: Cut the bow out with a saw.
Step 3: Clean the heck out of the metal with a glass brush and pumice powder.
Step 4: Using a paint brush, put the "glue" on the metal. It's actually called Klyr Fire.
Step 5: Sift the glass powder onto the metal. We use a mask to protect our lungs from the powder that gets in the air from sifting. Breathing in glass is not a good idea! It causes asthma and can eventually cause bleeding!! YUK! Ok, total buzz kill, but we do need to be careful! If you decide to try this it's important to know safety precautions!
Step 6: Put in a kiln at 1600 degrees. We also use UV protective glasses to prevent eye damage from the heat rods inside the kiln.
Leave it in for 2 minutes
Take it out!
So, this is not the entire instructions for enameling. There are a lot of in between steps that I skipped to keep this blog post short! Enameling is fun but time consuming.
Here are some other things that I have done. Well, I can't say that I actually finish them. I start them, cut them out and put the first coat of enamel on, but it takes a couple coats, cleaning, and fixing stilt marks and..... My mom does the rest.
This bird was the first thing I made from start to finish! It's still my favorite.
I also love my Skully Roger. I just sold this nugget, but I'll have to make another!!
Thursday, November 11, 2010
Quick Coffee Cup Cozy
I love Peppermint Mocha's from Starbucks! Possibly addicted to them. I was looking at the cardboard cozy that I got with my drink and decided to make one.
I traced the cozy onto paper and added a 1/2 inch seam allowance.
After sewing it wrong the first time, I realized the batting had to be on the bottom and the two fabrics above, right sides together. I used thin tracing paper on the bottom because the batting was getting caught up. It rips off real easy.
I added a vintage button and was done! I love easy projects like this. Makes me feel like I actually accomplished something today!!
Thanks, Patty, for this super cute fabric!!
I traced the cozy onto paper and added a 1/2 inch seam allowance.
Cut out my pattern then traced it onto the front fabric, back fabric and the lining.
After sewing it wrong the first time, I realized the batting had to be on the bottom and the two fabrics above, right sides together. I used thin tracing paper on the bottom because the batting was getting caught up. It rips off real easy.
Reversed,ironed and top stitched the whole thing. I also added a loop to go around the button on one edge.
Thanks, Patty, for this super cute fabric!!
Tuesday, November 9, 2010
Organza & Jewelry
I've been really diggin this new style of adding random fabrics to your jewelry. I LOVE FABRIC! So, of course I'm going to love them, right? Organza is a great fabric to add - it's light weight and comes in so many colors.
I used sterling silver chain but any type of chain will do. If you have some old chains or necklaces, you can add them together to make this style of necklace.
I had a string of black onyx that I "obtained" from my mother! They've been in a drawer for the last 5 years, she wont miss them. The chain on the other hand, she was reluctant to give up. I cut some long pieces of organza and used beading string to put it all together.
Start by stringing the first half of the necklace.
String it through and do it again!
Once you have the chain you want to use (I used two different types) lay it out on a flat surface with the ends even together. Use rings to attach the beaded section to the chain. Attach the second chain above that one. Be sure that they don't all hang at the same length!
I attached a bow on the side. I thought it was cute!!
I know you can't really see the black onyx part of the necklace, but it's there!
I used sterling silver chain but any type of chain will do. If you have some old chains or necklaces, you can add them together to make this style of necklace.
I had a string of black onyx that I "obtained" from my mother! They've been in a drawer for the last 5 years, she wont miss them. The chain on the other hand, she was reluctant to give up. I cut some long pieces of organza and used beading string to put it all together.
Start by stringing the first half of the necklace.
I accordioned the strip of organza and inserted the larger black onyx bead in the center, making sure to center the organza and the bead when stringing.
Knot a ring to both ends. Double or tripple knot it. Make sure the ring is solid all the way around so the string won't slip out. If you use an open ring try super gluing it in place. If you get glue stuck to your hands, I will have a tutorial on how to remove it soon! ;)
Once you have the chain you want to use (I used two different types) lay it out on a flat surface with the ends even together. Use rings to attach the beaded section to the chain. Attach the second chain above that one. Be sure that they don't all hang at the same length!
I attached a bow on the side. I thought it was cute!!
I know you can't really see the black onyx part of the necklace, but it's there!
Subscribe to:
Posts (Atom)